Looking online at all the different forums and threads on hella-horns I found that lots of questions were unanswered and there wasn't a detailed how-to with pictures and tips for the install. I've always wanted to install hellas, its the child coming out of me, so i finally broke down, bought them and wired them up.
Before you install a couple notes:
-Know how to remove your front bumper
-Know how to do very basic wiring
-I used 18 gauge wire for mine and it worked perfectly fine (lots of people use 12 gauge but you don't need to go that thick)
-Since we aren't using the relay and are using the stock horn power lines for power you may blow your stock fuse. the stock horn fuse is rated at 10 amps and these horns are 30 amps. Currently I'm using mine on the stock fuse and they are working fine and it hasn't blown yet, but if you do this install switch the horn fuse (located in the engine bay fuse box) to a 30 amp fuse so that it doesn't blow one day while using the horn on the road. (the guy i talked to before i installed everything said him and his buddy have both been using theirs for months on the stock 10 amp fuse with no problems, which is fine and if it works then all the better, but to be safe in the long run and to avoid having to be without a horn for a couple days while you buy a new fuse, switch to a 30 amp fuse)
I hope this helps all you guys who are interested in this!
LETS BEGIN!
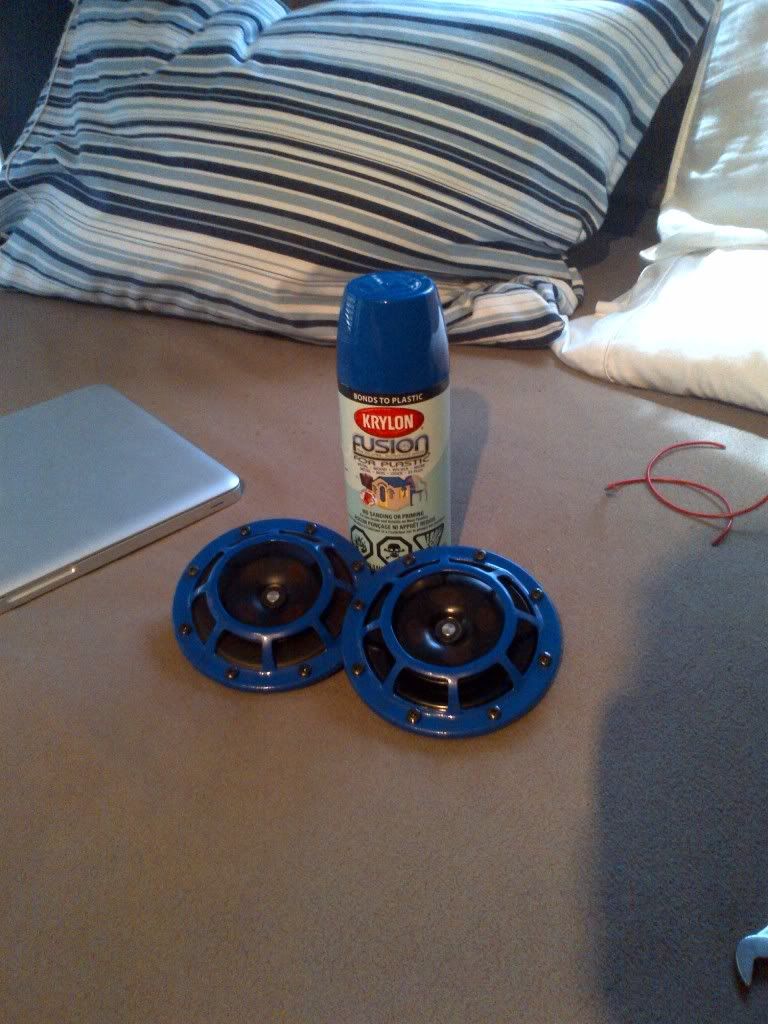
First thing i would say to do is choose which colour you want them. They come red stock as most of you probably know, but as i do and probably many of you do to, i have a certain colour scheme going on with my car, and the red just didn't fit! easy fix, i went to the hardware store and bought some self priming paint in the colour i wanted and painted the housing or grill. make sure you get paint that works on metal and is weatherproof or marked as outdoor paint. Also do multiple coats so that stones don't chip the paint! To take the housing or grill or whatever you want to call it off, just unscrew all the screws around the perimeter of the horn. Heres how they turned out:
the next thing you must do is prep the wiring on the horns. Now, on other forums, specifically a subaru one, i saw someone post that for the grounds on the horn they simply connected wire from the negative horn terminal (the copper coloured one) and then directly to the bolt on the back of the horn itself like this:
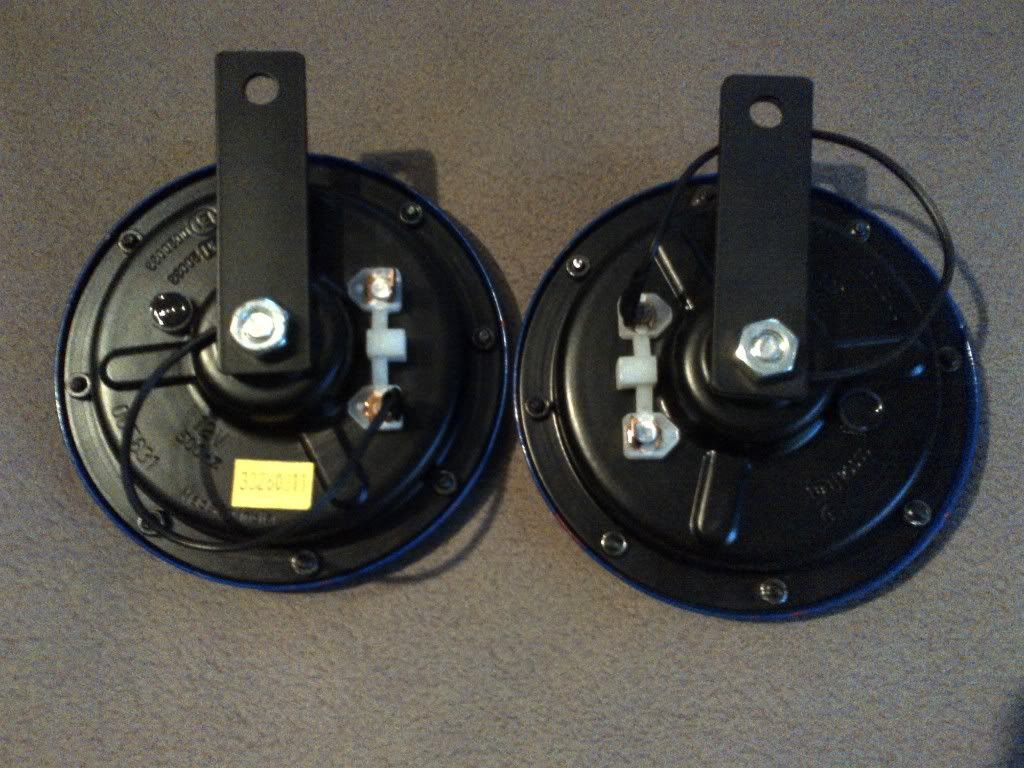
I tried this and it did not work so don't waste your time! Just connect your ground wire whichever way you want to the negative horn terminal (i soldered mine but you can use the clamp things) and then shrink-tube it for protection. Once this is done on both the horns, you are ready to go to your car that has its front bumper already taken off for mounting.
FIRST HORN:
For the first hella horn, mount it in the same spot the original horn was bolt in place. It is actually the perfect spot:
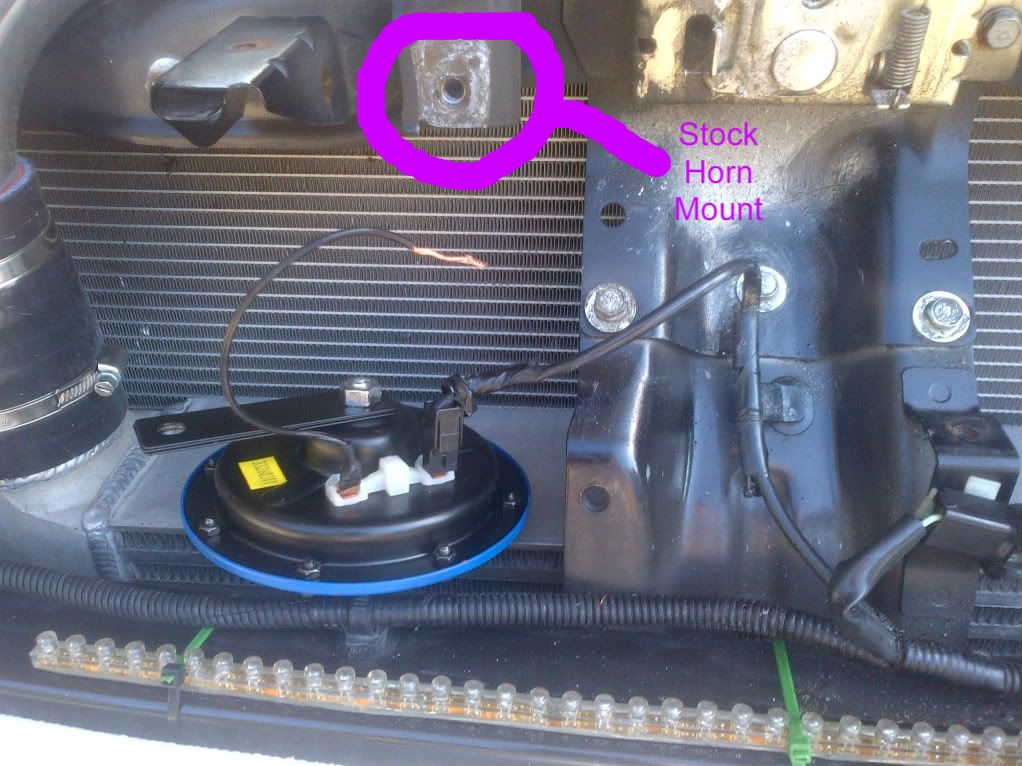
The only problem with this spot is there is a small tab that sticks out, that only allows you to mount the horn bracket such that it is 90 degrees to the beam and perpendicular to the ground. i am pointing to it in this picture. Simple fix: bend it out of the way with pliers:
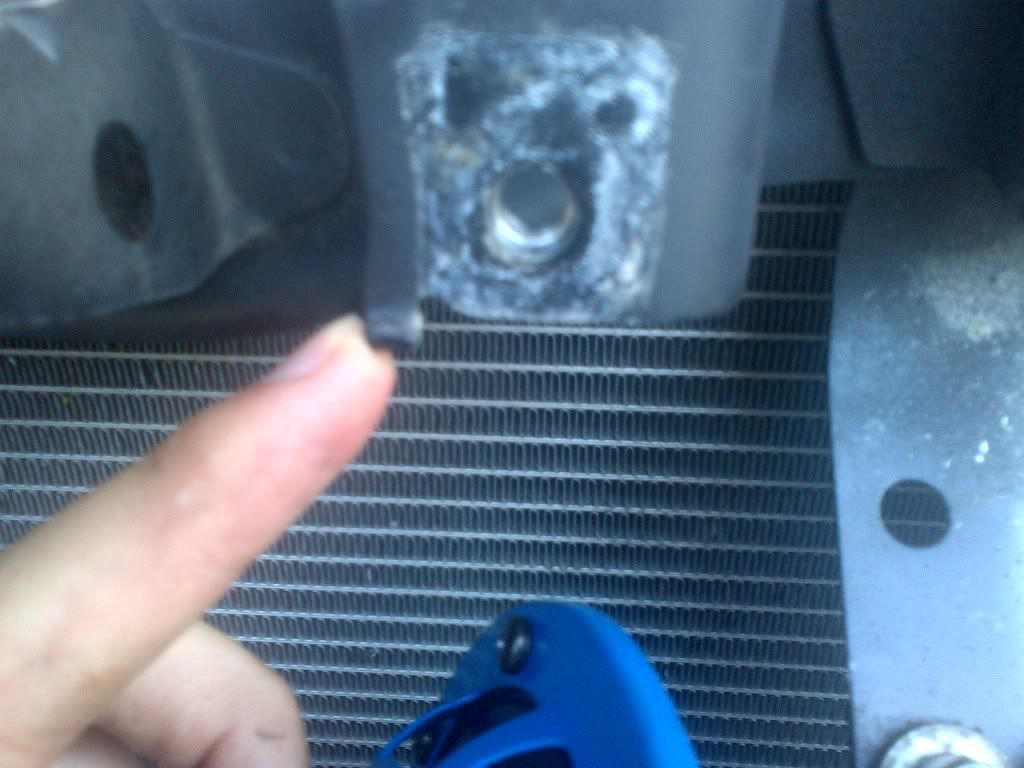
once the tab is bent out of the way, you can easily mount the horn to the body using the same screw that held the stock horn bracket in place.